See the Solution in Action
Concepts and Commands Used in the Demonstration
|
Please make sure to explain what each Skupper command does the first time you use it, especially for people unfamiliar with Skupper. The following commands should be explained:
|
Run the demonstration
Before getting started
To set up the demonstration, you need to have the following prerequisites:
-
Access to an OpenShift cluster with the Skupper and InstructLab installed.
-
A server running the InstructLab chat model.
-
Access to a terminal to run the commands.
-
Access to a web browser to interact with the chatbot.
-
oc client installed and configured to access the OpenShift cluster.
-
skupper client installed and configured to access the OpenShift cluster.
-
Podman installed to run the private Skupper.
AI Model Deployment with InstructLab
The first step is to deploy the InstructLab chat model in the InstructLab site. The InstructLab chat model will be responsible for receiving the user input and sending it to the LLaMA3 model. The response from the LLaMA3 model will be sent back to the user. This is based on the article: Getting Started with InstructLab for Generative AI Model Tuning.
mkdir instructlab && cd instructlab
sudo dnf install gcc gcc-c++ make git python3.11 python3.11-devel
python3.11 -m venv --upgrade-deps venv
source venv/bin/activate
pip install instructlab
|
Initialize the InstructLab Configuration
Now it’s time to initialize the InstructLab configuration. The ilab config init command is used to initialize the InstructLab configuration, creating the config.yaml file with the default configuration. Run the following command:
ilab config initThe output will be similar to the following, with the user being prompted to provide the necessary values to initialize the environment:
Welcome to InstructLab CLI. This guide will help you to setup your environment.
Please provide the following values to initiate the environment [press Enter for defaults]:
Path to taxonomy repo [/home/user/.local/share/instructlab/taxonomy]:
Path to your model [/home/user/.cache/instructlab/models/merlinite-7b-lab-Q4_K_M.gguf]:
Generating `/home/user/.config/instructlab/config.yaml` and `/home/user/.local/share/instructlab/internal/train_configuration/profiles`...
Please choose a train profile to use.
Train profiles assist with the complexity of configuring specific GPU hardware with the InstructLab Training library.
You can still take advantage of hardware acceleration for training even if your hardware is not listed.
[0] No profile (CPU, Apple Metal, AMD ROCm)
[1] Nvidia A100/H100 x2 (A100_H100_x2.yaml)
[2] Nvidia A100/H100 x4 (A100_H100_x4.yaml)
[3] Nvidia A100/H100 x8 (A100_H100_x8.yaml)
[4] Nvidia L40 x4 (L40_x4.yaml)
[5] Nvidia L40 x8 (L40_x8.yaml)
[6] Nvidia L4 x8 (L4_x8.yaml)
Enter the number of your choice [hit enter for no profile] [0]:
No profile selected - any hardware acceleration for training must be configured manually.
Initialization completed successfully, you're ready to start using `ilab`. Enjoy!
(1) Directory where the models are stored. (2) Directory where the datasets are stored. (3) Directory where the taxonomy is stored. (4) Directory where the checkpoints are stored. |
To enable external access to your model, please modify the config.yaml file, located into your instructlab directory: ~/.config/instructlab/config.yaml. This change needs to be done under the serve section, as shown below:
host_port: 0.0.0.0:8000
|
Before starting the server, download the model to be used by the chatbot. The ilab download command is used to download the model to be used by the chatbot. Run the following command:
ilab model download
|
Now, start the server that will be responsible for receiving the user input, sending it to the model, and sending the response back to the user. The ilab model serve command is used to start the server. Run the following command:
ilab model serve
|
Public Skupper Deployment
Deploy the public Skupper in Openshift Cluster. The public Skupper will receive the connection from the private Skupper and create a secure connection between the two sites.
Creating the project and deploying the public Skupper:
This is the step where you create the project and deploy the public Skupper. The public Skupper will be responsible for receiving the connection from the private Skupper and creating a secure connection between the two sites. Open a new terminal and run the following commands:
export SKUPPER_PLATFORM=kubernetes
oc new-project ilab-pilot
skupper init --enable-console --enable-flow-collector --console-user admin --console-password admin
|
|
Creating the token to allow the private Skupper to connect to the public Skupper:
This is the step where you create the token to allow the private Skupper to connect to the public Skupper. At the same terminal, run the following command:
skupper token create token.yaml
|
Now, you’ll have a token.yaml file with the token to connect the two sites.
Private Skupper Deployment
The second step is to deploy the private Skupper in Private Local Environment. The private Skupper will be responsible for creating a secure connection between the two sites, allowing the Ollama Pilot application to send requests to the InstructLab chat model.
Install Skupper
To install skupper on site A, with podman as the platform, open a new terminal to handle all the commands related to the private Skupper. Here, we will create a skuper site using podman as the platform, we need to enable the podan service before running the skupper init command:
systemctl --user enable --now podman.socket
|
Now, run the following commands to install Skupper:
export SKUPPER_PLATFORM=podman
skupper init --ingress none
|
Exposing the InstructLab Chat Model
To bind the local service running the InstructLab chat model to the Skupper service:
skupper expose host <YOUR MACHINE IP> --address instructlab --port 8000
|
|
Check the status of the Skupper service:
skupper service status

Services exposed through Skupper:
╰─ instructlab:8000 (tcp)
|
Secure Communication Between the Two Sites with Skupper
Now it’s time to establish a secure connection between the two sites using the token created by the public Skupper. Using the token created by the public Skupper, run the following command at the terminal where the private Skupper is running:
skupper link create token.yaml --name instructlab
|
Check the status of the Skupper link:
skupper link status

Links created from this site:

        Link instructlab is connected

Current links from other sites that are connected:

        There are no connected links
|
Check the status on the public Skupper terminal:
skupper link status

Links created from this site:

       There are no links configured or connected

Current links from other sites that are connected:

       Incoming link from site b8ad86d5-9680-4fea-9c07-ea7ee394e0bd
|
Chatbot with Protected Data
The last step is to expose the service in the public Skupper and create the Ollama Pilot application.
-
Still on the terminal where the public Skupper is running, run the following command to expose the service:
skupper service create instructlab 8000
|
Deploying the InstructLab Chatbot
Before run the chatbot, let’s understand the final part of this solution, the Frontend application.
This application will be deployed in a OpenShift cluster, and will be responsible for sending the user input to the InstructLab chat model and displaying the response to the user. The application will be deployed at the same namespace where the public Skupper is running.
|
Deploy ILAB Frontend chatbot
To deploy the ILAB Frontend chatbot, lets use the following yaml deployment file, in this case the file is located at ~/instructlab/ilab-client-deployment.yaml:
apiVersion: apps.openshift.io/v1
kind: DeploymentConfig
metadata:
  name: ilab-client
spec:
  replicas: 1
  selector:
    app: ilab-client
  strategy:
    type: Recreate
  template:
    metadata:
      labels:
        app: ilab-client
    spec:
      containers:
      - name: ilab-client-container
        image: quay.io/rzago/ilab-client:latest
        ports:
        - containerPort: 5000
        env:
        - name: ADDRESS
          value: "http://instructlab:8000" # The address of the InstructLab chat model connected to the private Skupper
  triggers:
  - type: ConfigChange
Apply the deployment file:
oc apply -f ~/instructlab/ilab-client-deployment.yaml
|
Creating the service of the ILAB Frontend chatbot deployment
Now, let’s create the service for the ILAB Frontend chatbot deployment, the file is located at ~/instructlab/ilab-client-service.yaml:
apiVersion: v1
kind: Service
metadata:
  name: ilab-client-service
spec:
  selector:
    app: ilab-client
  ports:
  - protocol: TCP
    port: 5000
    targetPort: 5000
Apply the service file:
oc apply -f ~/instructlab/ilab-client-service.yaml
|
Exposing the service of the ILAB Frontend chatbot deployment
We are almost there, now let’s expose the service of the ILAB Frontend chatbot deployment, the file is located at ~/instructlab/ilab-client-route.yaml:
apiVersion: route.openshift.io/v1
kind: Route
metadata:
  name: ilab-client-route
spec:
  to:
    kind: Service
    name: ilab-client-service
  port:
    targetPort: 5000
Apply the route file:
oc apply -f ~/instructlab/ilab-client-route.yaml
|
Accessing the ILAB Frontend chatbot
Finally, to access the ILAB Frontend chatbot, you can use the following command to get the public URL:
oc get route ilab-client-route
|
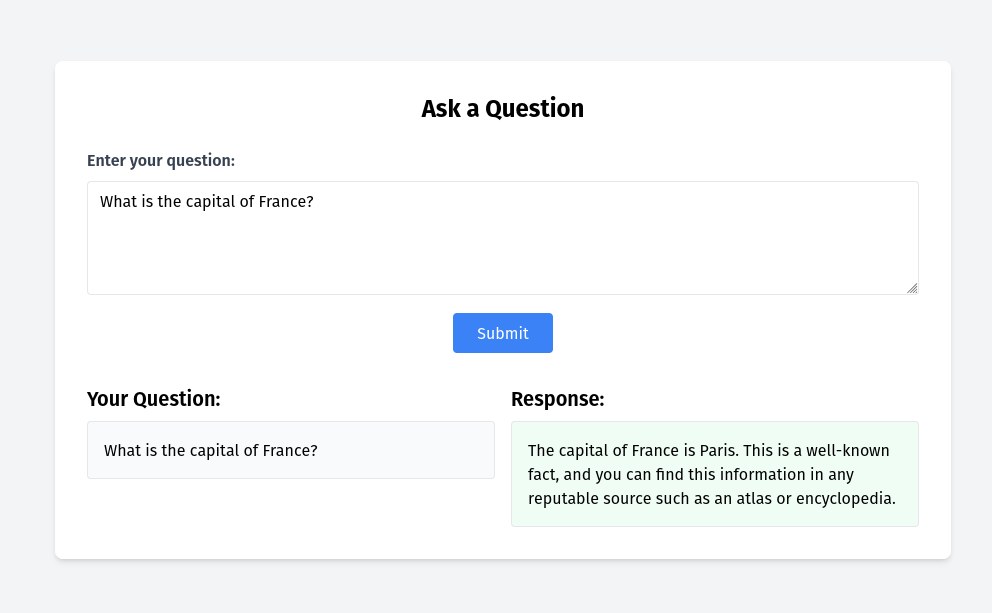
Interacting with the chatbot
To interact with the chatbot, you can access the public URL of the ILAB Frontend chatbot using a web browser. The chatbot will be displayed on the screen, and you can start interacting with it by typing messages in the chat window.
Considerations
-
If your machine has an Nvidia GPU, you can use the InstructLab chat model to generate responses to user input. The InstructLab chat model is a large language model trained on the Merlinite dataset and is capable of generating human-like responses to user input. By following the steps outlined in this demonstration, you can deploy the InstructLab chat model in your environment and interact with it using the ILAB Frontend chatbot. This will allow you to experience the power of generative AI models and see how they can be used to create engaging and interactive applications.
-
Adjust the model temperature to control the randomness of the responses generated by the chatbot. A lower temperature will result in more deterministic responses, while a higher temperature will result in more random responses. Experiment with different temperature values to find the right balance between coherence and creativity in the chatbot’s responses.
-
Image repository for ilab-client: rafaelvzago/ilab-client