Solution Pattern: Accelerate time to value with Red Hat Openshift Service on AWS.
Workshop
1. Installing the workshop environment
We need a ROSA cluster with STS or we can create a cluster from here.
2. Workshop Steps
-
Part A: Now using cli, we will create the following resources and follow these steps:
-
A secret:
oc create -f https://raw.githubusercontent.com/gmidha1/ostoy/master/deployment/yaml/secret.yaml -
A configmap:
oc create -f https://raw.githubusercontent.com/gmidha1/ostoy/master/deployment/yaml/configmap.yaml -
A microservice, this microservice will be used by UI, hence we are deploying it first:
oc new-app https://github.com/gmidha1/ostoy \ --context-dir=microservice \ --name=ostoy-microservice \ --labels=app=ostoy -
UI Application:
oc new-app https://github.com/gmidha1/ostoy \ --env=MICROSERVICE_NAME=OSTOY_MICROSERVICE -
Expose the ostoy service using cli:
oc create route edge --service=ostoy --insecure-policy=Redirect -
Once pod is ready, get the route using cli:
oc get route -
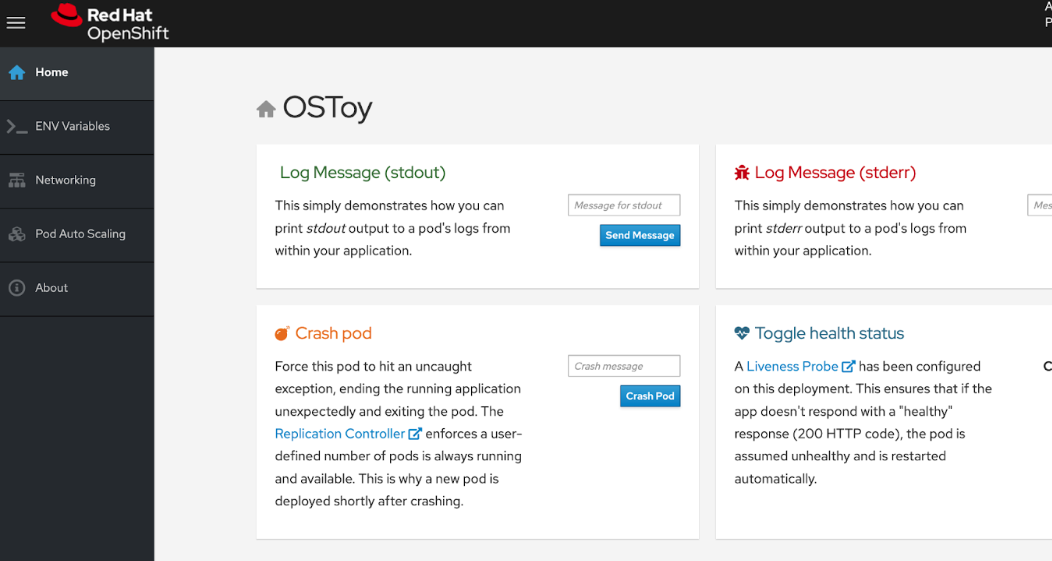
Access the route for ostoy through a web browser, it will look like the below image:
-
Using the above UI, we can print logs(stdout & stderr) and we can crash the pod also. Once we have used the UI for the former steps, we can check the logs and pod status using the cli commands:
oc get pods oc logs -f <pod-name> -
Now, let us set the liveness probe using this cli command:
oc set probe deploy ostoy --liveness --get-url=http://:8080/health -
From the UI, using the Toggle health status, we can make the pod unhealthy and it will restart the pod. We can check the pod status using this cli:
oc get poBelow screenshot shows that ostoy pod was restarted.
-
-
Part B:
-
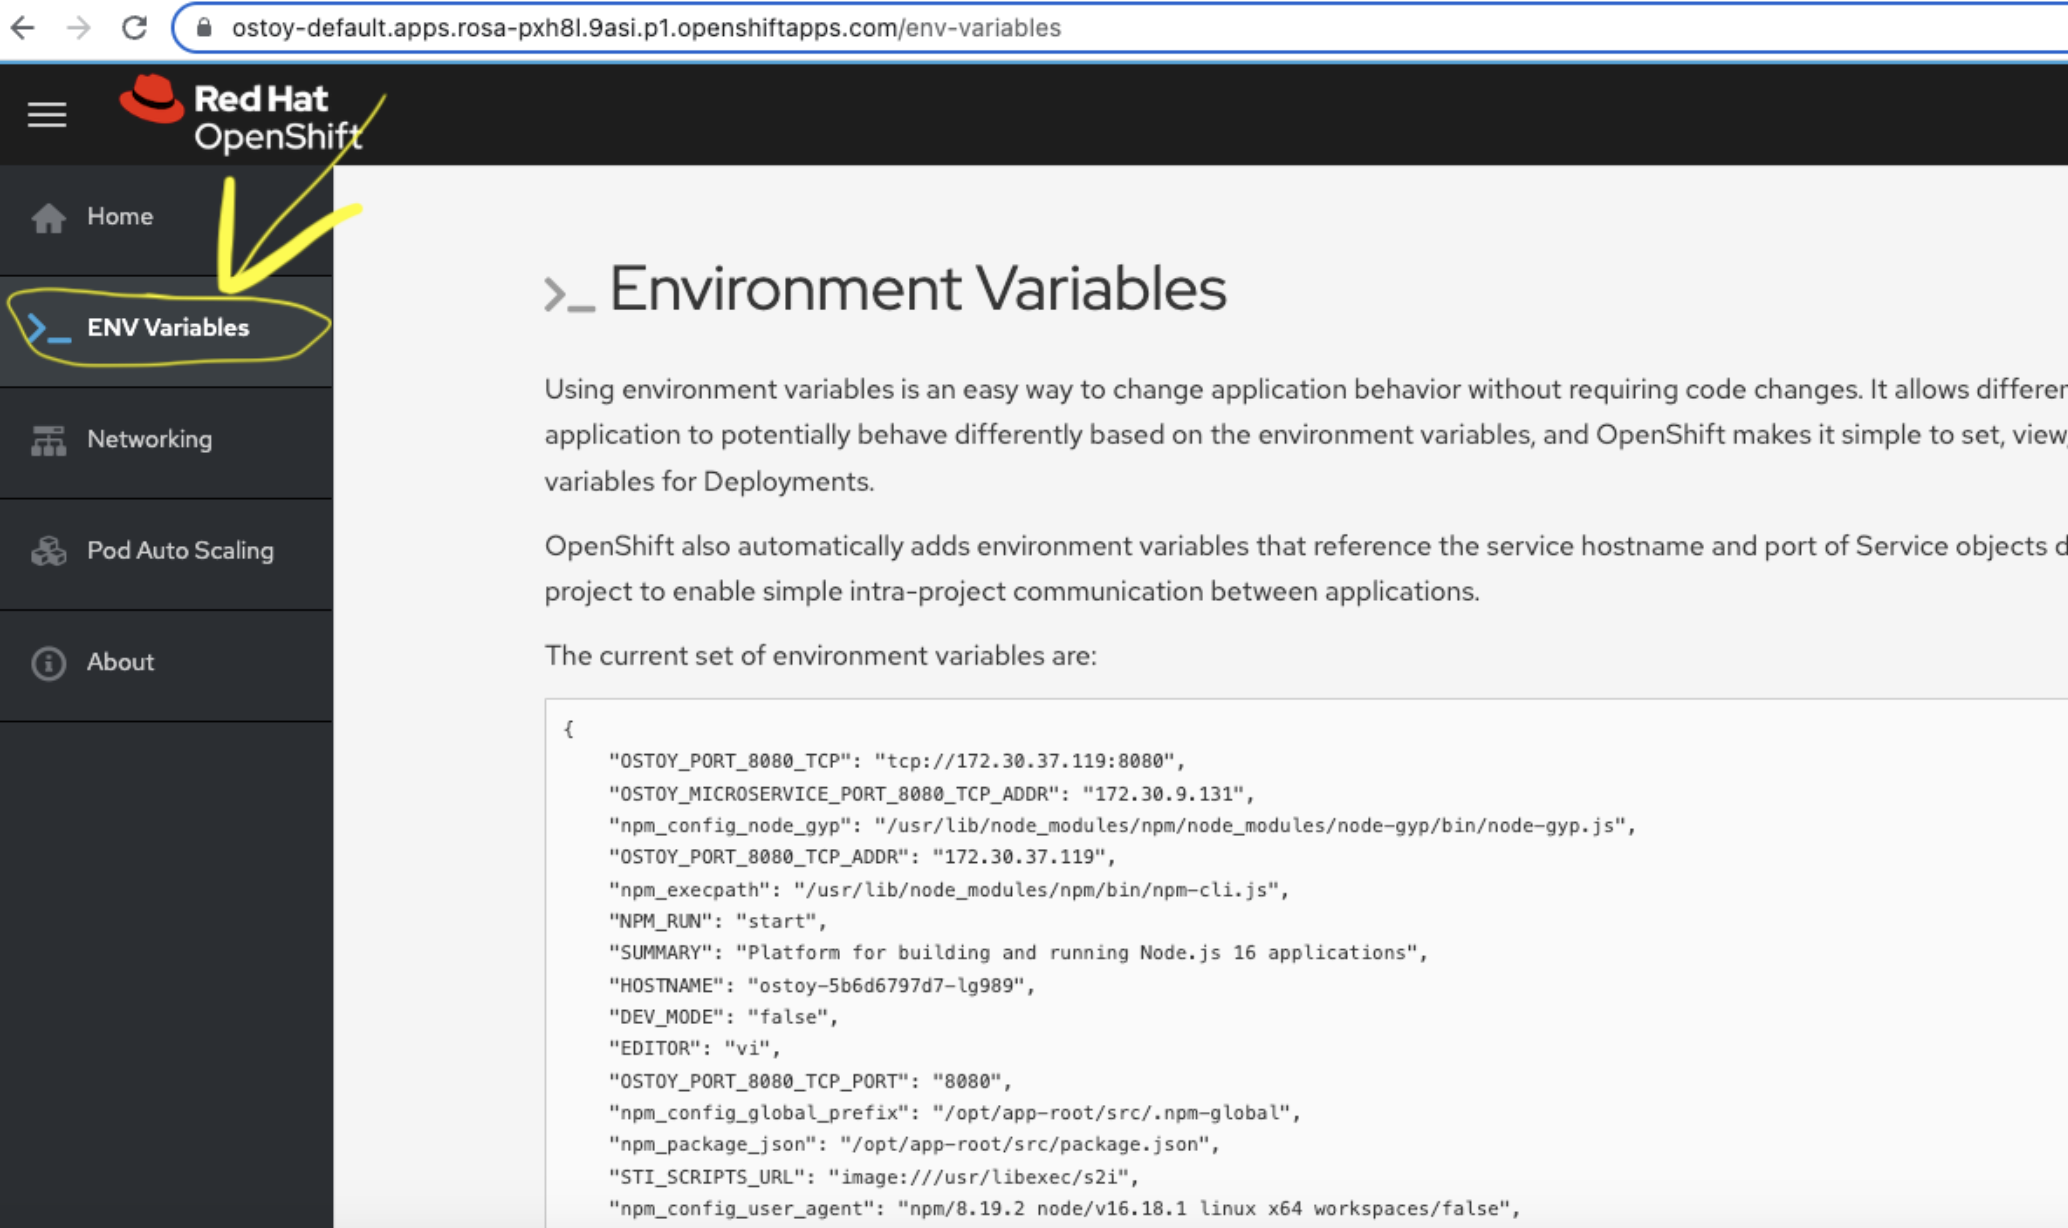
In this screen of OSToy UI, we can view the environment variables available to the pod.
-
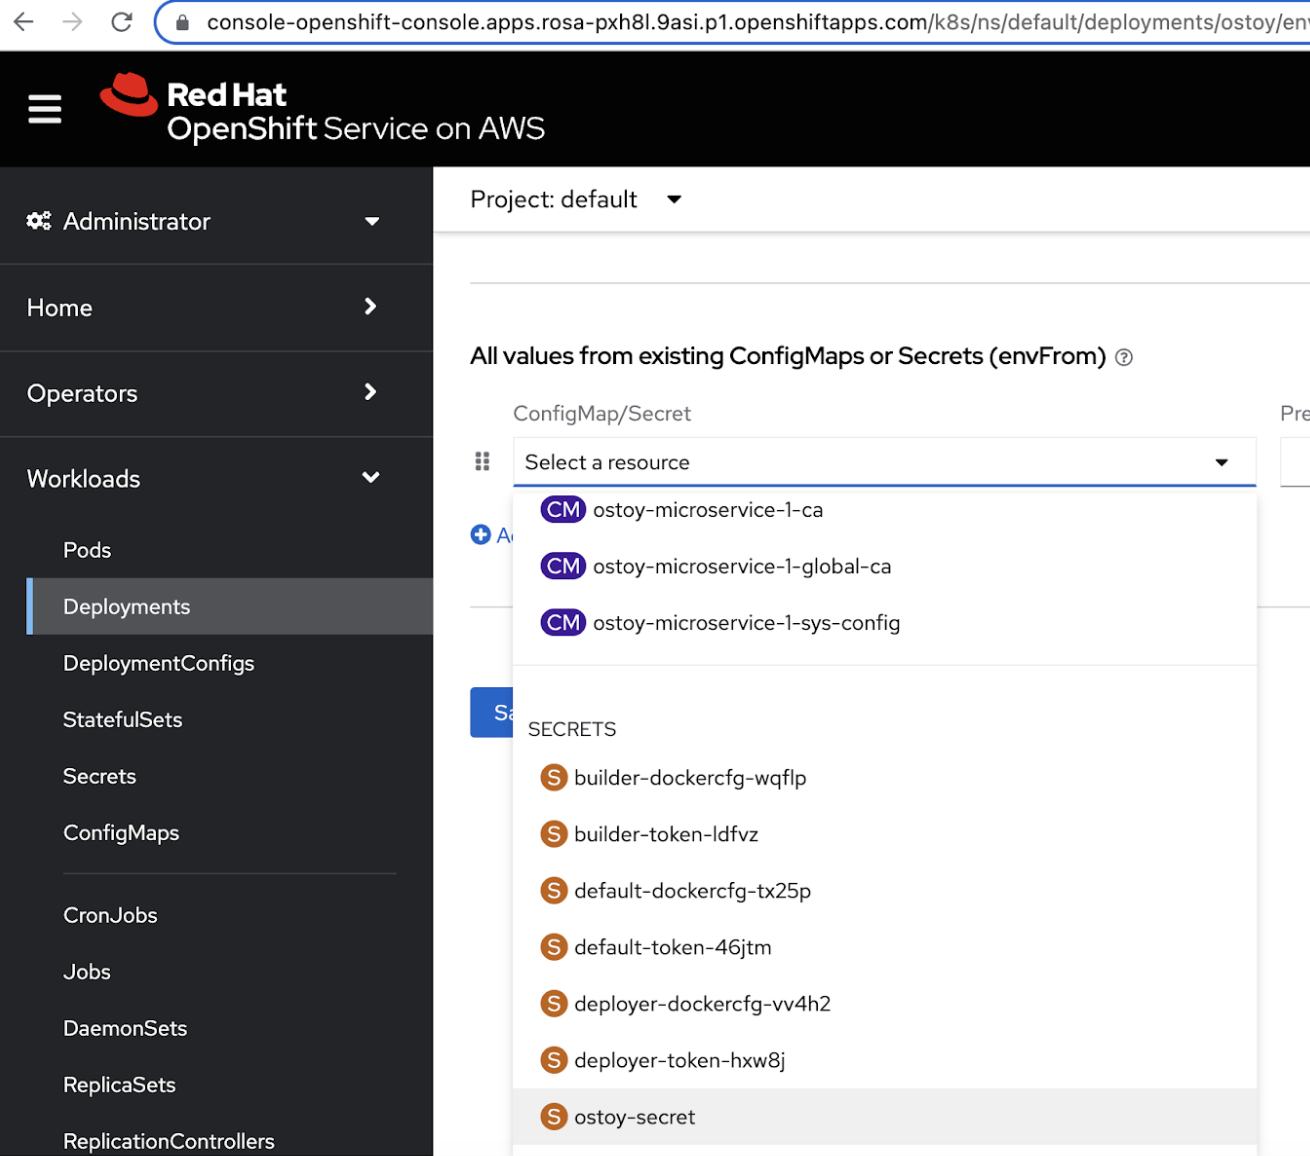
Now by going here: ROSA console UI → workloads → Deployments → Project: default → ostoy → Environment. We can add the environment variable from a secret: ostoy-secret which we created earlier.
-
On successfully adding the secret, the pod will restart automatically. We will be able to see the new secret from OSToy frontend UI → “Env Variables” as shown below:
-
Similarly, we can add ostoy-config using the above steps we used for adding the secret. Now config.json is available for the application to be used as an environment variable.
-
-
Part C: In the next steps, we will see the networking tab features available on OSToy UI application:
-
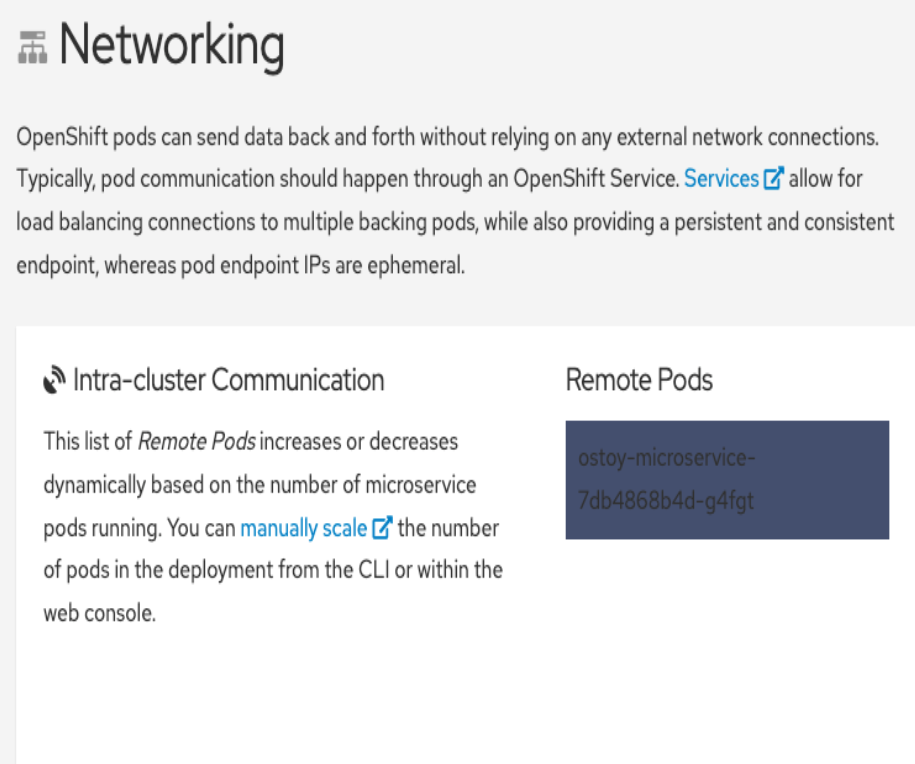
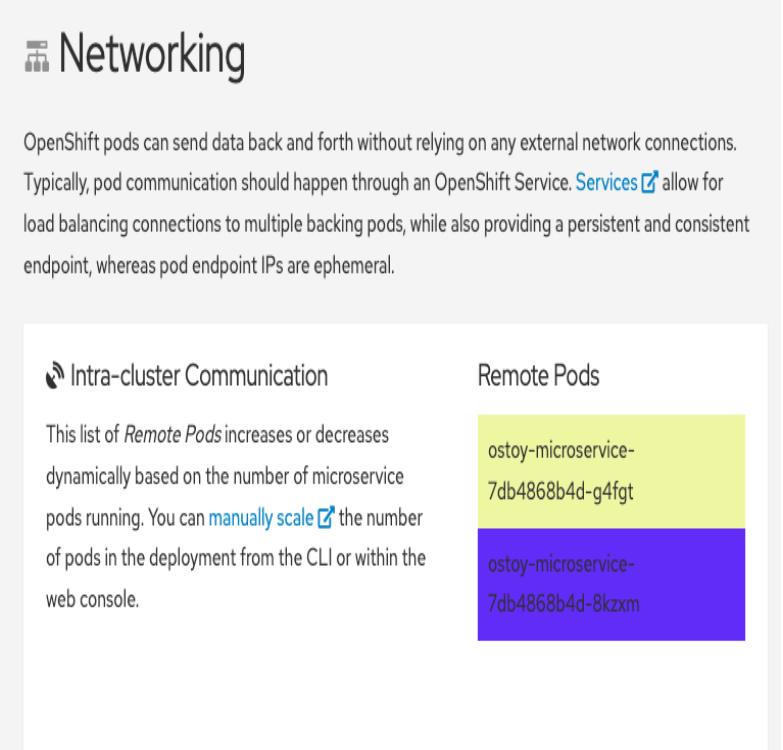
Intra-cluster communication: It displays how many pods OSToy UI is able to interact within the cluster. Below picture shows, it is able to communicate with “ostoy-microservice” pod.
-
Now we will scale the deployment of ostoy-microservice to 2 using this cli command from terminal:
oc scale deployment ostoy-microservice --replicas=2 -
We will watch the pod using cli:
oc get pod -w -
Once the pod is up, we will be able to see it in the OSToy frontend UI → Networking as shown in below image:
Note: Please scale down the service as we will be scaling it up again in next part of workshop.
-
-
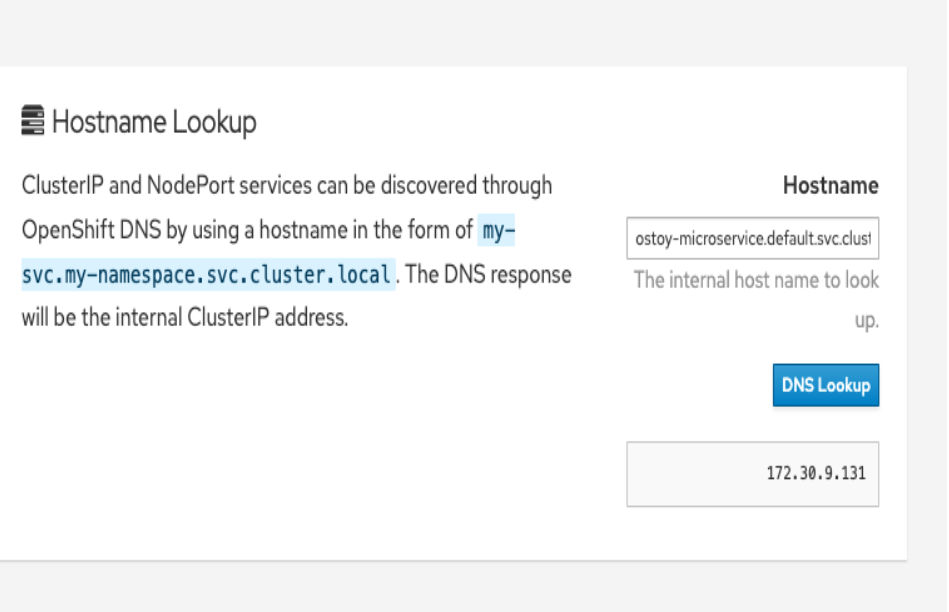
Hostname Lookup: Using this feature we can discover ClusterIP and NodePort services through OpenShift DNS by using a hostname in the form of my-svc.my-namespace.svc.cluster.local. The DNS response will be the internal ClusterIP address. For example: we can use: “ostoy-microservice.default.svc.cluster.local” to test it.
-
-
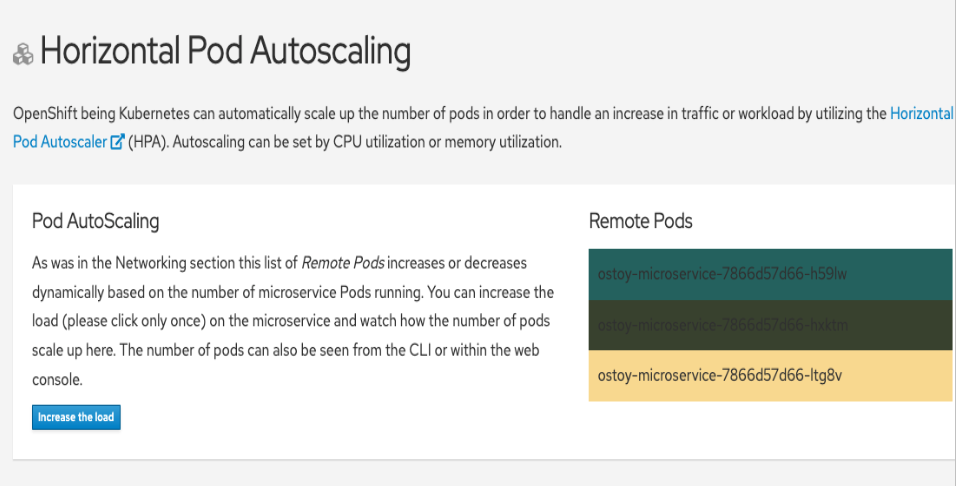
Part D: Now we will look at Horizontal Pod AutoScaler. In OSToy UI, we will go to “Pod Auto Scaling”. This tab displays the number of microservices pod currently running. At present only one should be running.
-
Using the below cli command, we will add the cpu and memory requests on ostoy-microservice deployment:
oc set resources deployment ostoy-microservice --requests=cpu=100m,memory=256Mi -
Now we will create a Horizontal Pod AutoScaler resource using this cli:
oc autoscale deployment/ostoy-microservice --min=1 --max=3 --cpu-percent=50 -
After that using the OSToy UI, we can increase the load on microservice using the “Increase the load” button.
-
After 2-3 mins, once the load has increased on the ostoy-microservice, Horizontal Pod AutoScaler resource will add more pods.
-
Additional pods will be visible in OSToy Frontend UI, as shown below in the image.
-
This concludes our workshop, we can remove the resources which we created so far.
